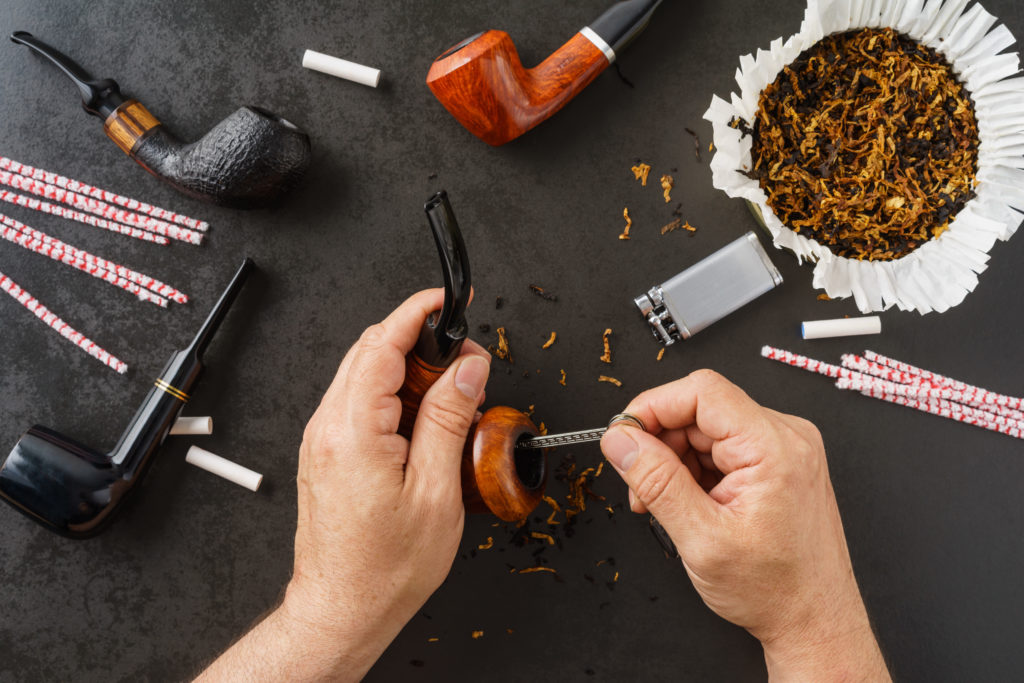
Cleaning your pipe regularly is essential for maintaining its performance, preserving its flavors, and ensuring a pleasant smoking experience. Proper cleaning removes residue and moisture that can accumulate over time. Whether you’re a beginner or an experienced pipe smoker, this guide will walk you through how to clean a pipe.
A clean pipe is not only essential for maintaining optimal performance but also for preserving the flavors and ensuring a pleasant smoking experience. Just like any cherished possession, your pipe deserves regular care and attention to keep it in top condition. Properly cleaning your pipe removes residue, moisture, and build-up, allowing you to enjoy the true essence of your tobacco. In this guide, we will take you through the step-by-step process of cleaning a pipe, providing valuable tips and techniques to help you maintain your pipe’s longevity and enhance your smoking pleasure.
By incorporating regular cleaning into your pipe smoking routine, you’ll not only ensure a cleaner and fresher smoke but also deepen your connection with this timeless tradition. Let’s dive into the art of cleaning a pipe and discover how to keep your pipe shining and ready for the next delightful smoke.
What you’ll need:
Before you begin cleaning your pipe, gather the following supplies:
- Pipe cleaners: These thin, flexible wires with absorbent material help remove residue from the stem and shank.
- Pipe cleaners or bristle brushes: For cleaning the bowl’s interior.
- Rubbing alcohol or pipe cleaning solution: Used to dissolve buildup and sanitize the pipe.
- Soft cloth or paper towels: To wipe and dry the pipe.
How to Clean A Pipe
- Allow the Pipe to Cool: Ensure the pipe has cooled down completely before cleaning. Cleaning a hot pipe can be dangerous and cause damage to both you and the pipe.
- Empty the Bowl: Tap the pipe gently against your hand or an ashtray to remove any remaining ash or tobacco remnants from the bowl. Be careful not to damage the pipe’s rim or walls.
- Disassemble the Pipe: If your pipe is a two-piece or three-piece design, carefully separate the stem from the shank. This will allow for better access when cleaning the stem and shank individually.
- Cleaning the Stem: Insert a pipe cleaner into the stem and gently push it through to remove any moisture or residue. Repeat the process with fresh pipe cleaners until they come out clean. If there are stubborn buildups, dip a pipe cleaner or bristle brush in rubbing alcohol or pipe cleaning solution and carefully scrub the stem’s interior. Rinse with clean water and allow to dry.
- Cleaning the Shank: Use a pipe cleaner or bristle brush to clean the shank thoroughly. Insert the cleaner or brush into the shank and twist it gently to remove any residue. Repeat the process with fresh cleaners until they come out clean. Avoid using excessive force to prevent damage to the pipe.
- Cleaning the Bowl: Use a pipe cleaner or bristle brush to clean the interior of the bowl. Insert the cleaner or brush and rotate it gently, making sure to reach all areas of the bowl. Remove any loose debris and residue. If the bowl has a thick cake buildup, use a pipe reamer or scraper to carefully scrape away excess cake, maintaining a thin and even layer. Be cautious not to damage the bowl’s walls.
- Sanitizing the Pipe: For a deeper clean, you can sanitize your pipe by dipping a pipe cleaner or cloth in rubbing alcohol and running it through the stem and shank. This helps dissolve stubborn residue and eliminates bacteria. Allow the alcohol to evaporate completely before using the pipe again.
- Drying and Polishing: After cleaning and sanitizing, use a soft cloth or paper towel to wipe the pipe’s exterior and interior, removing any remaining moisture. Ensure the pipe is completely dry before reassembling and storing it. To add a polished finish, you can buff the pipe’s exterior gently with a soft cloth.
- Regular Maintenance: To keep your pipe in optimal condition, establish a regular cleaning routine. Clean your pipe after every few smoking sessions or when you notice residue buildup. Additionally, store your pipe in a clean and dry environment to prevent moisture or mold growth.
Properly cleaning your pipe is crucial for maintaining its performance and enjoying a satisfying smoking experience. By following these steps and establishing a regular cleaning routine, you can keep your pipe in excellent condition, preserve its flavors, and ensure countless enjoyable smoking sessions to come. Embrace the maintenance process as a part of your pipe smoking journey, and let your pipe shine with pride as a well-cared-for companion.
Pipe Cleaning Best Practices
Pipe Rotation
A smoker’s rotation refers to the number of pipes they currently own, as well as the order in which they’re smoked. Knowing your own pipe-smoking behaviors is key to establishing a good maintenance regimen. You have to know which ones need to be cleaned next, and when.
Ideally, if you have enough pipes, you should allow each one to sit for 2-4 days before being used again after a cleaning.
Before Smoking
The pipe-care cycle begins with your very first puff. If you want an optimal smoking experience each time, clean the stem each time, before and after, with a pipe cleaner. This will dislodge any leftover ash or dottle. Then, gently tap the pipe on the palm of your hand to remove the debris
While Smoking
Another technique for maintaining your pipe while you smoke is by paying attention to how you smoke. When you’re lighting the pipe, do your best to burn the tobacco, not the rim. (Charred rims eventually happen, however, so if you notice a dark tint, try removing it by rubbing the defected area with a moistened pipe cleaner.) Sour, salty, or just plain bad taste is a good indicator that a cleaning is in order. It can even give clues as to what exactly is wrong.
After Smoking
Never, ever remove the stem of a pipe before it cools, because this will cause it to loosen, which in turn may cause a crack to form in the shank or tenon. Allow at least a couple minutes, and then start the cleaning. Stir up any ash or dottle left in the bowl, cover the bowl with the palm of your hand, and shake it. This will help speed the formation of what is known as the bowl’s cake, a protective layer of carbonized tobacco and ash that acts as a natural guard against burnouts. Dump out the remaining ash, run a bristle cleaner all the way from the stem to the bottom of the bowl, remove it, and repeat.
After a few bristle cycles the pipe should look clean; any leftover spots can usually be polished off with a wet pipe cleaner—the residual moisture of which you can simply blow away with your own mouth.
Keep those Pipes Clean
Remember, the cleaning process may vary slightly depending on the type of pipe material. For example, briar pipes require special care to avoid damaging the delicate briarwood. If you’re uncertain about cleaning methods for a specific pipe material, consult the manufacturer’s guidelines or seek advice from experienced pipe smokers or reputable tobacconists.
Lastly, cleaning your pipe is not just about hygiene; it’s also an opportunity to develop a deeper connection with your pipe. Embrace the ritual of cleaning, taking the time to appreciate the craftsmanship, the memories shared during smoking sessions, and the companionship that your pipe provides. Each cleaning session is a chance to reflect on the joys of pipe smoking and to prepare your pipe for the next moment of relaxation and contemplation.
So, dedicate a few moments to the care and cleaning of your pipe. Embrace the process, enjoy the tranquility it brings, and let your pipe continue to be a reliable companion on your journey of pipe smoking pleasure.


