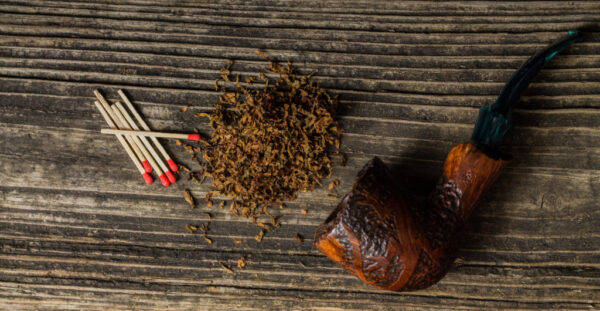
Pipe smoking is a centuries-old tradition that offers a unique and contemplative experience for enthusiasts. From selecting the right pipe to mastering the art of packing and lighting, there are several elements to consider as a beginner. In this beginner’s guide to smoking a pipe, we will explore the essentials, providing step-by-step instructions and tips to help you embark on your pipe smoking journey with confidence.
Guide to Smoking a Pipe
Whether you’re seeking relaxation, flavor exploration, or a moment of tranquility, this guide will walk you through the fundamentals of pipe smoking, enabling you to savor the pleasure and richness of this timeless tradition.
Choosing Your First Pipe
Selecting the right pipe is crucial for a pleasant smoking experience. Consider factors such as material, shape, and size. A corn cob pipe, such as the Missouri Meerschaum Legend, is a popular choice for beginners due to its affordability and cool smoke. Briar pipes, like those from brands such as Peterson or Savinelli, are known for their durability and ability to enhance tobacco flavors. Explore different shapes, such as Billiard or Dublin, to find one that fits comfortably in your hand and suits your style.
Exploring Tobacco Options
Experimenting with different tobacco blends allows you to discover your preferred flavors and aromas. There are three main types of tobacco: aromatic, non-aromatic, and English blends. Aromatic blends have added flavors for a pleasing scent, while non-aromatic blends focus on the natural tobacco taste. English blends, also known as Balkan blends, offer a smoky and rich experience. Start with small sample sizes to try different blends and find the ones that appeal to your taste.
Preparing Your Pipe
Preparing your pipe properly sets the foundation for an enjoyable smoke. Begin by cleaning the pipe bowl with a pipe cleaner to remove any leftover ash or debris. Then, choose your desired tobacco and pack it into the bowl, ensuring a loose but even pack. Experiment with packing techniques such as the three-layer method or the Frank method to find what works best for you.
The first task to tackle in breaking in your new pipe. The most common wood used in tobacco pipe production happens to be very heat resistant, though it can be prone to burnouts, hot spots, and cracking if not handled correctly. You’ve probably seen older gentleman load up their pipe by dropping the pipe into a pouch of tobacco, jamming the bowl full with their thumb, filling it completely, and then lighting it–again, and again, and again.
Charring
With either gas and flint lighter or matches–ideally wooden–approach the top of the bowl with the flame and draw air in through the stem. Don’t inhale the smoke; instead, draw it into your mouth and exhale it back out. Hover the flame above the tobacco in circular motions as you do this to ensure that the tobacco burns evenly by the time you do start to inhale.
Before you hit that point, however, let it die out. This process is known as charring, and it will ensure that any excess moisture is removed from the pipe tobacco prior to the actual smoke. How long exactly you should char your bowl depends on your individual tastes and preferences for moisture concerning particular blends; it’s a learning process.
Gently tamper down the thin layer of ash using the tamper on your pipe tool and light the bowl the same way as before. This time, it should stay lit. For good measure, give it some good puffs, but slow down quickly. The objective isn’t intense, quick smoke, but long, sustained, cool smoke. If you have to re-light a couple of times, that’s okay, but give it enough time to cool down before doing this. Certain types of pipes require more or less time than others.
Lighting the Pipe
To light your pipe, use wooden matches or a pipe lighter. Hold the flame slightly above the tobacco and draw gently while lighting the top layer. Take care to rotate the pipe bowl to achieve an even burn. Once lit, tamp down the ash gently with a tamper to create an even surface. If the pipe goes out, use a charring light technique by applying the flame to the charred edges and relight.
Simply put, you shouldn’t have to light your bowl repeatedly as you smoke a single packed bowl. Simply stuffing a solid column of pipe tobacco into the bowl leaves very little air for the combustion, which results in a very hot and wet smoke, which in turn results in tongue bite: a sharp, stinging sensation on the tongue that makes the experience unpleasant.
The solution? Gravity. Sprinkle tobacco onto the bowl until it overflows slightly, and then tamper it down, gently, until it’s about halfway down into the bowl. Repeat this procedure until the tobacco is now at the top of the bowl. It should feel spongy to the touch. To test readiness, suck some air through the mouthpiece. The tobacco will be loose enough at the bottom to allow for ample combustion to take place without excessive re-lights and harsh inhales.
Smoking Technique
Pipe smoking is about relaxation and savoring the flavors. Take slow and gentle puffs, allowing the smoke to roll over your palate and enjoying the nuances of the tobacco. Avoid inhaling the smoke; instead, draw it into your mouth and exhale it slowly. Relax, take your time, and let the pipe do the work. Avoid excessive puffing, which can result in overheating and a bitter taste.
A full bowl of pipe tobacco can last anywhere from 10 minutes to an hour, or even longer. As you progress the bowl, the tastes should change, at least somewhat, as the oils inside further concentrate in the bottom of the bowl, and as you smoke more and more, you’ll learn to manipulate them in your favor without even thinking too much about it.
Maintaining Your Pipe
Proper pipe maintenance ensures a fresh and enjoyable smoke. After each session, allow the pipe to cool down before emptying the bowl of ash. Use a pipe cleaner to clean the stem and shank, removing any moisture or residue. Occasionally, use a pipe reamer or scraper to remove excess buildup from the bowl’s interior. Regular cleaning and care will extend the life of your pipe and maintain its optimal performance.
Expanding Your Knowledge
As a beginner, there is always more to learn about pipe smoking. Join online forums or local pipe clubs to connect with experienced enthusiasts who can offer advice and share their knowledge. Explore resources like books, blogs, or videos dedicated to pipe smoking to deepen your understanding of the art and history of this time-honored tradition.
Relax and Enjoy
Pipe smoking is a leisurely activity that provides an opportunity for relaxation and reflection. Find a comfortable and quiet space where you can fully immerse yourself in the experience.
Create a soothing ambiance with soft music, a favorite book, or simply the serenity of nature. Use pipe smoking as a moment to unwind, reflect, and enjoy the flavors and aromas that the tobacco offers.
Remember to pace yourself and take breaks between puffs to avoid overheating the pipe. Allow the tobacco to burn at its own pace, and relish the slow and deliberate rhythm of pipe smoking.
Lastly, be patient and persistent. Pipe smoking is a skill that develops over time. Each smoke will teach you something new about the nuances of different blends, packing techniques, and the unique characteristics of your pipe. Embrace the learning process, enjoy the journey, and let your passion for pipe smoking guide you to a deeper appreciation of this cherished tradition.
Welcome to the World of Pipe Smoking
As a beginner, embarking on the journey of pipe smoking is an exciting adventure filled with relaxation, flavor, and contemplation. By selecting the right pipe, exploring various tobacco blends, mastering the art of packing and lighting, and adopting a relaxed smoking technique, you can create a fulfilling and enjoyable pipe smoking experience.
Remember to take your time, savor the flavors, and appreciate the moments of tranquility that come with the ritual of pipe smoking. With each session, you’ll gain valuable insights and refine your own unique approach.
So, sit back, relax, and let the soothing smoke of your pipe whisk you away to a world of indulgence, where time slows down, and the simple pleasures of life take center stage. Enjoy the journey, and may your pipe smoking experiences be filled with relaxation, contemplation, and the delightful flavors of fine tobacco.


